EXERCISE
In this exercise you will learn how to develop an MDI app. As a high-level overview, you will:
- use the MDI Desktop to install the MDI on your personal computer
- launch the web server by running it on your computer
- add the demo tool suite to your MDI installation
- modify the demo app by adding an appStep to run your mtcars plotter
Prerequisites
To complete the instructions below you should have completed these exercises:
- MDI Pipelines » EXERCISE #1
- R and Shiny » EXERCISE #3
STEP #1 - Install the MDI Desktop on your PC
MDI apps run equivalently on any computer that can run R - this includes your PC, which is where you will do most work with Stage 1 Apps.
There are several ways to install and run the MDI locally, but we recommend installing the MDI Desktop, a program that makes it easy to launch an MDI web server from your Windows or Mac computer:
Follow the simple installation instructions. You can accept any security challenges your PC shows - the program is safe to run.
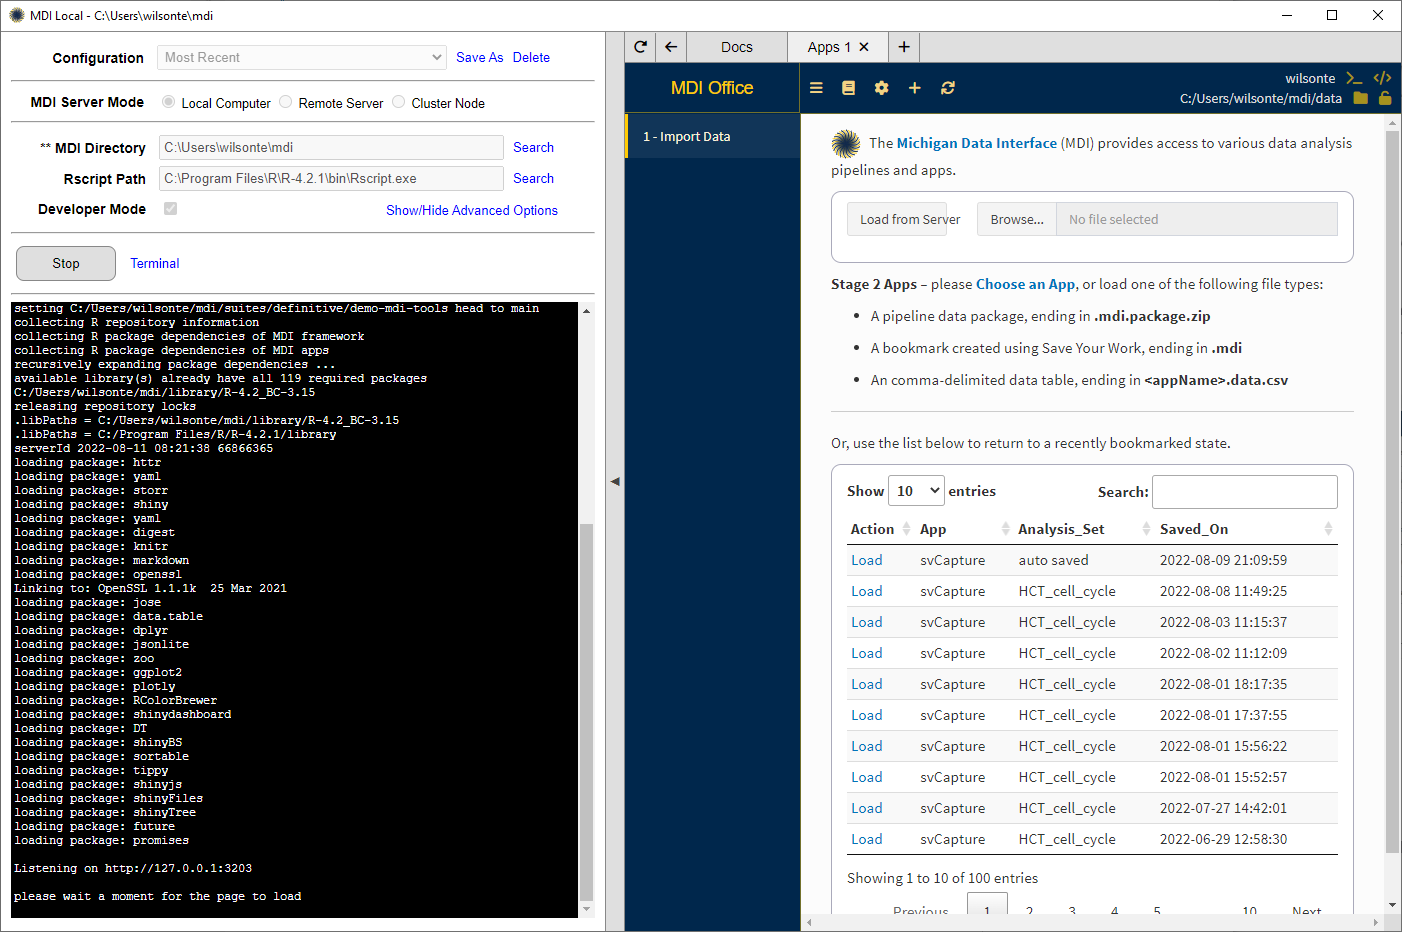
Once you have the Desktop installed and opened, set MDI Server Mode to “Local Computer” and add configuration values for MDI Directory and Rscript Path, using the “Search” links to help load the appropriate paths on your computer.
STEP #2 - Install the MDI web server on your PC
When ready, click the (Re)Install button in the Desktop, accepting any prompts to continue. If you have set the configuration values properly, the MDI installation process will begin in the black terminal window.
It will takes several minutes to complete the installation as many R packages need to be installed.
STEP #3 - Run the MDI web server on your PC
Once the installation is complete, click Start. A web browser will open on the right side of the Desktop once the server is ready to go.
What is happening is that your computer is acting as both the web server (in the terminal window on the left) and the web client (in the browser on the right). Take a look at the output in the terminal window to see the progress log being generated by the server as you interact with apps in the browser.
STEP #4 - Add the mdi-demo-tools suite to your installation
At this point you are running the framework but no apps, so you can’t really do anything yet! Let fix that by adding the MDI demo tool suite to your installation:
You add a tool suite by editing file config/suites.yml under your MDI installation folder. There are two ways to do it - pick whichever your prefer:
- open config/suites.yml in your code editor
- click the gear, i.e., cog, icon at the top of your browser and select suites.yml
Edit the file to include the entry:
# config/suites.yml
suites:
  - MiDataInt/demo-mdi-tools
Save your edits.
If you chose to edit suites.yml in the app, it will install the tool suite immediately. If you were working in a code editor, you need to stop your server and re-run the installation from Step #2 above, which will go much faster now, then restart the server.
Finally, validate your installation of the demo suite by loading your previous demo pipeline data package into the MDI launch page. It should launch the demo app, just as it did on our public server in a previous exercise.
STEP #5 - Add a new appStep to mdi-demo-tools
Finally, we will edit the demo app to add one more appStep tab called “4 - Basic Training”.
You will first want to Stop the server, set Developer Mode to selected, and Start the server again. This will allow you to immediately see the changes you will make as you edit the demo app.
Next, find the app scripts, which will be in folder /mdi/suites/definitive/demo-mdi-tools/shiny/apps/demo. Open that folder in your code editor.
To help you get started, the demo app includes the shell of the new app step ready to take your mtcars code. Your first goal is to activate the app step by uncommenting the basicTraining appStep in config.yml:
# apps/demo/config.yml
appSteps:
    upload: # nearly always the 1st step of every app
        module: sourceFileUpload
        shortLabel: "Adjust Data Sources"
        shortDescription: "Drag and drop additional source data file(s)."
    display: # usually the 2nd step of every app
        module: displayResults
    withCode:
        module: withCode
    basicTraining: # !! REMOVE THE COMMENT MARKS FROM THIS SECTION !!
        module: basicTraining
Now reload your web browser into the demo app to see the new tab (hint: click on the “MDI” text at the upper left corner to reload the page). Click on your new tab to see a few initial UI elements.
Finally, edit the following two files to fill the Basic Training page with your mtcars code:
- apps/demo/modules/appSteps/basicTraining/basicTraining_ui.R
- apps/demo/modules/appSteps/basicTraining/basicTraining_server.R
Here’s what you need to understand: previously, your app had a UI and a server function for the entire app. When embedding your code into an MDI app step, you still have a ui and server function, but now they define an appStep module. You can think of it as an “app within an app”. Otherwise, the organizational concept is the same:
- declare inputs and outputs in basicTraining_ui.R
- react to inputs and fill outputs in basicTraining_server.R
You’ll soon see how quickly you can elaborate complex apps when all you have to do is declare and populate app steps.
STEP #6 - Demonstrate your success
Email your mentor a screen shot of your MDI Desktop window running your mtcars code within the MDI demo app under the Basic Training step.